
Dark Maximalist Bookshop Decor
Damask Steampunk Wallpaper
As seen on Instructables
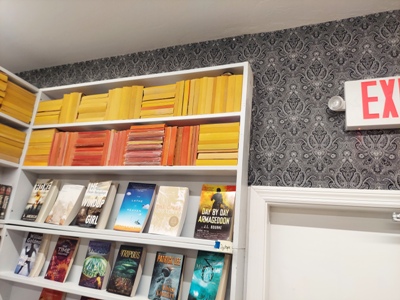
 My bookshop is decorated in a Dark Maximalist style that I like to think of as "industrial Atlantis." I have a bad case of champagne taste on a beer budget (bookselling is not a famously well-paid profession) so I do a lot of DIY stuff when I have decor ideas that I want to embrace. That's how I ended up installing fancy damask wallpaper in my sci-fi & fantasy nook - on a budget.
Because the wall area in question was actually pretty small, I decided I wanted velvet wallpaper. (The theory was, with such a small space, I could buy something more expensive because I wouldn't need very much.) I ended up not having to buy anything at all and I did this project entirely for free, using leftover fabric from a previous project. It went so well that I think I may do it again in the future rather than installing wallpaper (which I don't enjoy, due to the mess). You can also do fabric wallpaper using liquid starch (the old fashioned way) but I was really happy with the outcome here, and I didn't use any glue or starch at all.
Books for Gothic Home-Makers
Loving the look of Dark Maximalism? Try out one of these titles for inspiration.
 Everything: A Maximalism Style Guide by Abigail Ahern
"Maximalism, or the "more is more" world of decorating, is here! The style that embraces the all-out--beautiful color palettes, luxurious textiles, patterns, and embellishment--has made a comeback. Maximalism is the epitome of passion, one in which Scandi-style, stripped bare, and pared-back interiors have no place. Abigail Ahern guides us through the change in the world of interiors as the pendulum swings away from minimalism and over to our increasing desire for self-expression and optimism. Readers will learn how to break the "rules" of interior design, play fast and loose with different periods in a single room, and have fun. Maximalism allows us to dip into color palettes and any decade or style, with the effect of stirring up emotions and creating a bedazzling space we never want to leave."
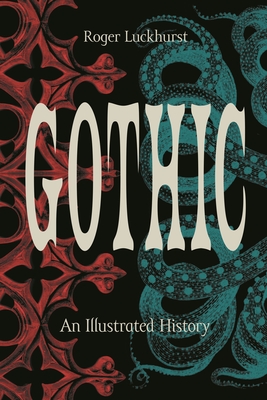 Gothic: An Illustrated History by Roger Luckhurst
"Organizing his wide-ranging history by theme, Luckhurst begins with Gothic architecture and form, including such elements as the arch, the house, and ruins. He considers how the Gothic is depicted in rural and urban settings, as well as in the wilderness and borderlands. And he delves into Gothic traditions and settings around the world, from the sublime Alps and Australian outback to the Arctic wasteland, from the dark folkloric realm of the forest to the postindustrial landscapes of abandoned hospitals and asylums, and then beyond the bounds of the planet to unknowable cosmic horror. Luckhurst investigates the monsters that mirror ourselves and society, and demonstrates that as the Gothic has traveled across the globe and through time, it has morphed according to the shape of our changing fears and anxieties."
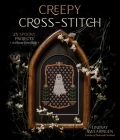 Creepy Cross-Stitch by Lindsay Swearingen
"From spooky skulls to ghoulish graveyards, Lindsay Swearingen of Tusk and Cardinal gives cross-stitch a dark yet whimsical update. Curious creatures like phantom felines, legendary fixtures from folklore like Baba Yaga and all manner of haunted houses make the perfect subjects for these needlework masterpieces. Fun and easy to learn, cross-stitch is an art form that truly anybody can master. Lindsay gives you a crash course in the basics to ensure you have all the materials and techniques you need to start off on the right foot. Then, dive into her incredible patterns and stitch yourself some oddities that range from quirky to downright eerie. Anyone with an appreciation for the macabre will swoon for patterns like Lovers’ Graves, which features twin headstones and a heart-shaped weeping willow. Meanwhile, the ghosts, ghouls and ghastly bats of Trick or Treat and Haunted Wings are perfect pieces to hang on your wall to keep the spirit of Halloween in your home year-round. With moody tones, muted hues and spooky subjects, this collection of bewitching patterns makes it easy to add a little subversive charm to your cross-stitch repertoire."
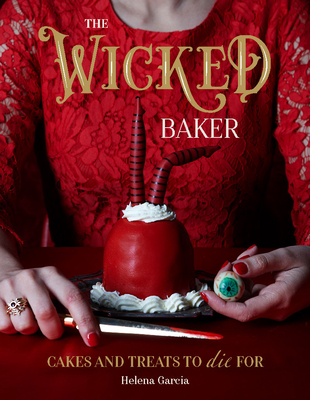 The Wicked Baker by Helena Garcia
"Give your baking a wicked twist with eerily clever ideas for all manner of cakes, cookies, pastries, breads, desserts and even drinks to spook up your cooking repertoire and make Halloween an occasion to remember. Whether you're a curious witch, a Halloween fiend or you just want to add a creepy touch to your baking, Helena Garcia will give you all the inspiration you need."
 Grow in the Dark by Lisa Eldred Steinkopf
"In Grow in the Dark, author Lisa Eldred-Steinkopf, known as the Houseplant Guru, shares the knowledge she’s gained tending to her own personal jungle of over 1,000 houseplants. Having a south-facing window doesn’t always guarantee you the best light to grow plants—especially if your window faces an alley or a tree-lined street. What’s the point of growing an urban jungle if tall buildings are blocking all your sunshine? This compact guide, designed to look as good on your shelf as it is useful, will help you learn how to make the most of your light so you can reap the physical and emotional benefits of living with plants."
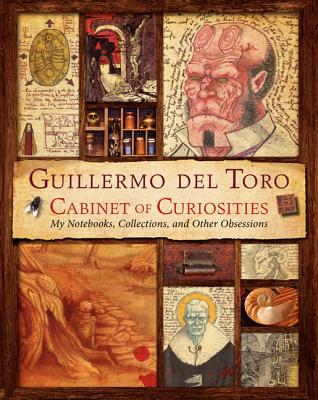 Cabinet of Curiosities: My Notebooks, Collections, and Other Obsessions by Guillermo del Toro
"Over the last two decades, writer-director Guillermo del Toro has mapped out a territory in the popular imagination that is uniquely his own, astonishing audiences with Cronos, Hellboy, Pan's Labyrinth, and a host of other films and creative endeavors. Now, for the first time, del Toro reveals the inspirations behind his signature artistic motifs, sharing the contents of his personal notebooks, collections, and other obsessions. The result is a startling, intimate glimpse into the life and mind of one of the world's most creative visionaries. Complete with running commentary, interview text, and annotations that contextualize the ample visual material, this deluxe compendium is every bit as inspired as del Toro is himself."
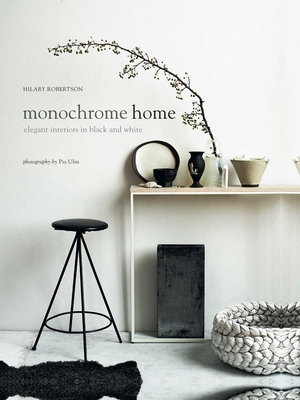 Monochrome Home: Elegant Interiors in Black and White by Hilary Robertson
"Sought-after interiors stylist Hilary Robertson celebrates the stylish simplicity of the monochromatic home—elegant interiors in black, white, and every shade of grey in between. In the first chapter, The Monochrome Palette, Hilary analyzes five different monochrome schemes, providing moodboards for different effects: In Black and White, Grey Matters, Shades of Pale, Dark Looks, and In the Mix. Following on, Let there be Light provides examples of interiors with a whiter, brighter approach, while The Dark Room visits homes that have employed darker monochrome palettes. Next, in Monochrome Home, Hilary Robertson shows how to bring the look right up to date, visiting the fabulously inspiring homes of artists, architects and designers across the globe from London and Paris to Copenhagen, rural Sweden, and NYC."
 Edgar Allan Poe Tarot by Rose Wright and Eugene Smith
"Rose Wright is an author, certified Reiki healer, and lifelong student of tarot and astrology. You can find her along the Los Angeles shoreline practicing healing arts and energy work. In her spare time, she enjoys writing middle-grade fiction. Her work has been featured in Refinery 29, New Worlds Magazine, and New Leaf Magazine. Eugene Smith is an illustrator born and raised in California and now residing in Chicago, IL. He decided that all that time spent doodling in notebooks and scribbling on walls should be put to good use, and so he pursued a BFA in painting and drawing from the Academy of Art University in San Francisco. His work has appeared in books, editorials, tarot card decks, and educational graphic novels. He lives with his lovely wife, two children, and an odd dog."
How-To: Easy Fabric Wallpaper (No-Sew, No-Glue)
Materials
- Fabric
- Measuring tape
- Pinking Shears
- Thumbtacks (fancy ones if you like)
- Ladder
- Iron + Ironing Board
- Philips Head Screwdriver
- Flat Head Screwdriver
 Step 1. Test the Look
I used thumbtacks to secure a piece of the fabric to my wall to get an idea of how it would look, in case I didn't like it. I let it hang there for a day or so and then I made my decision. (For this part, I didn't worry too much about lining up the pattern, I just used a scrap piece to get a general feeling for how it looks.)
Step 2. "Measure twice, cut once."
I had a 25 foot tape measure because the space I had to cover was really long. I recommend that you use a tape measure that is long enough for your project (instead of using a short one and adding up the measurements). Pretty much everything I was doing was squared shapes so it wasn't super difficult to cut the fabric to the correct shape. I cut at least two inches more than I needed on all sides (you can always cut off the extra, but you can never add more when you come up short). IMPORTANT: Think about how you're going to line up the pattern so it doesn't look wonky later on. Just like with sewing, you might need extra fabric to match plaids or patterns.
 Step 3. Finish Fabric Edges
Finish the fabric edges so they don't unravel. I used pinking shears, but you can also serge the edges, or use fraycheck, or whatever your preferred method is. Then, iron the edges that need to be folded over. For me, that was only the top of the fabric because my selvages on this brocade are beautiful. But most fabrics would need to have the side edges ironed.
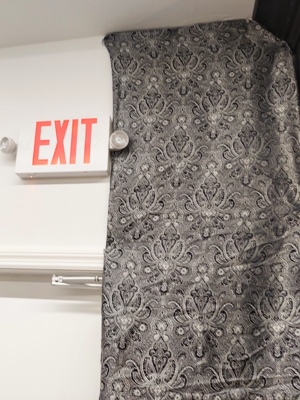
Step 4. Installation time!
Secure the top of the fabric first, and let it hang down in place. Once you have the entire top done (for me it was by the ceiling) then come back around and secure the rest in place, moving from top to bottom, double checking as you go to be sure it is smooth and the pattern is matched correctly. You might want a buddy for this part. IMPORTANT: You'll need to cut around any fixtures just as you would for wallpaper. In my case, I had to work with the exit sign (this is what the phillips head is for). That was definitely the most difficult part of this project. On the built-in bookcases, I got lucky: there was a tiny gap behind the crown molding that I was able to slide the fabric under (I used a flathead screwdriver to assist). On the rest of that shelf, I carefully folded the edges down so the wallpaper was flush with the corner. In general, take your time and be sure the fabric is completely flat on the wall. This is the detail that will make the difference in terms of whether it looks professional or not.
 Step 5. Final Touches
I didn't really like how the clear thumbtacks looked so I spent some time trying out other ways to secure the fabric to the wall. Silver push pins looked stupid; so did white ones. I ended up ordering some black pushpins online to replace the clear thumbtacks with and really take it that extra mile to looking super professional.
About Us | Contact Us | Privacy Policy | Return Policy | Outside Sales | Sandman Blog | Affiliates


Copyright ©2024 Sandman Book Company